
Selling to B2B customers in Europe? Learn how to promote VAT exemption directly in your Shopify mini cart—no Shopify Plus required. This simple customization helps business customers discover they can shop tax-free, right when they add items to their cart
The mini cart or cart drawer is where your B2B customers make their final purchase decision. If VAT exemption isn’t visible and functional right there in the mini cart, you’re forcing B2B buyers to abandon the drawer, navigate to the full cart page, and complete a separate validation step. Most won’t. This guide explains how to integrate VAT exemption into your Shopify mini cart or cart drawer so B2B customers can validate their VAT number and proceed to checkout without leaving the cart experience.
In this article, you’ll learn how to show business customers that they can request VAT exemption in your webshop in a smart way. This works in the mini cart, even without Shopify Plus.
Do you sell to business customers within Europe? Then you can offer these customers VAT exemption. To do this, you need to validate their VAT number during the checkout process. This way you can give that customer VAT exemption.
Without Shopify Plus, you have limited options. For example, you can only ask for the VAT number in the checkout. That’s why you need to be creative.
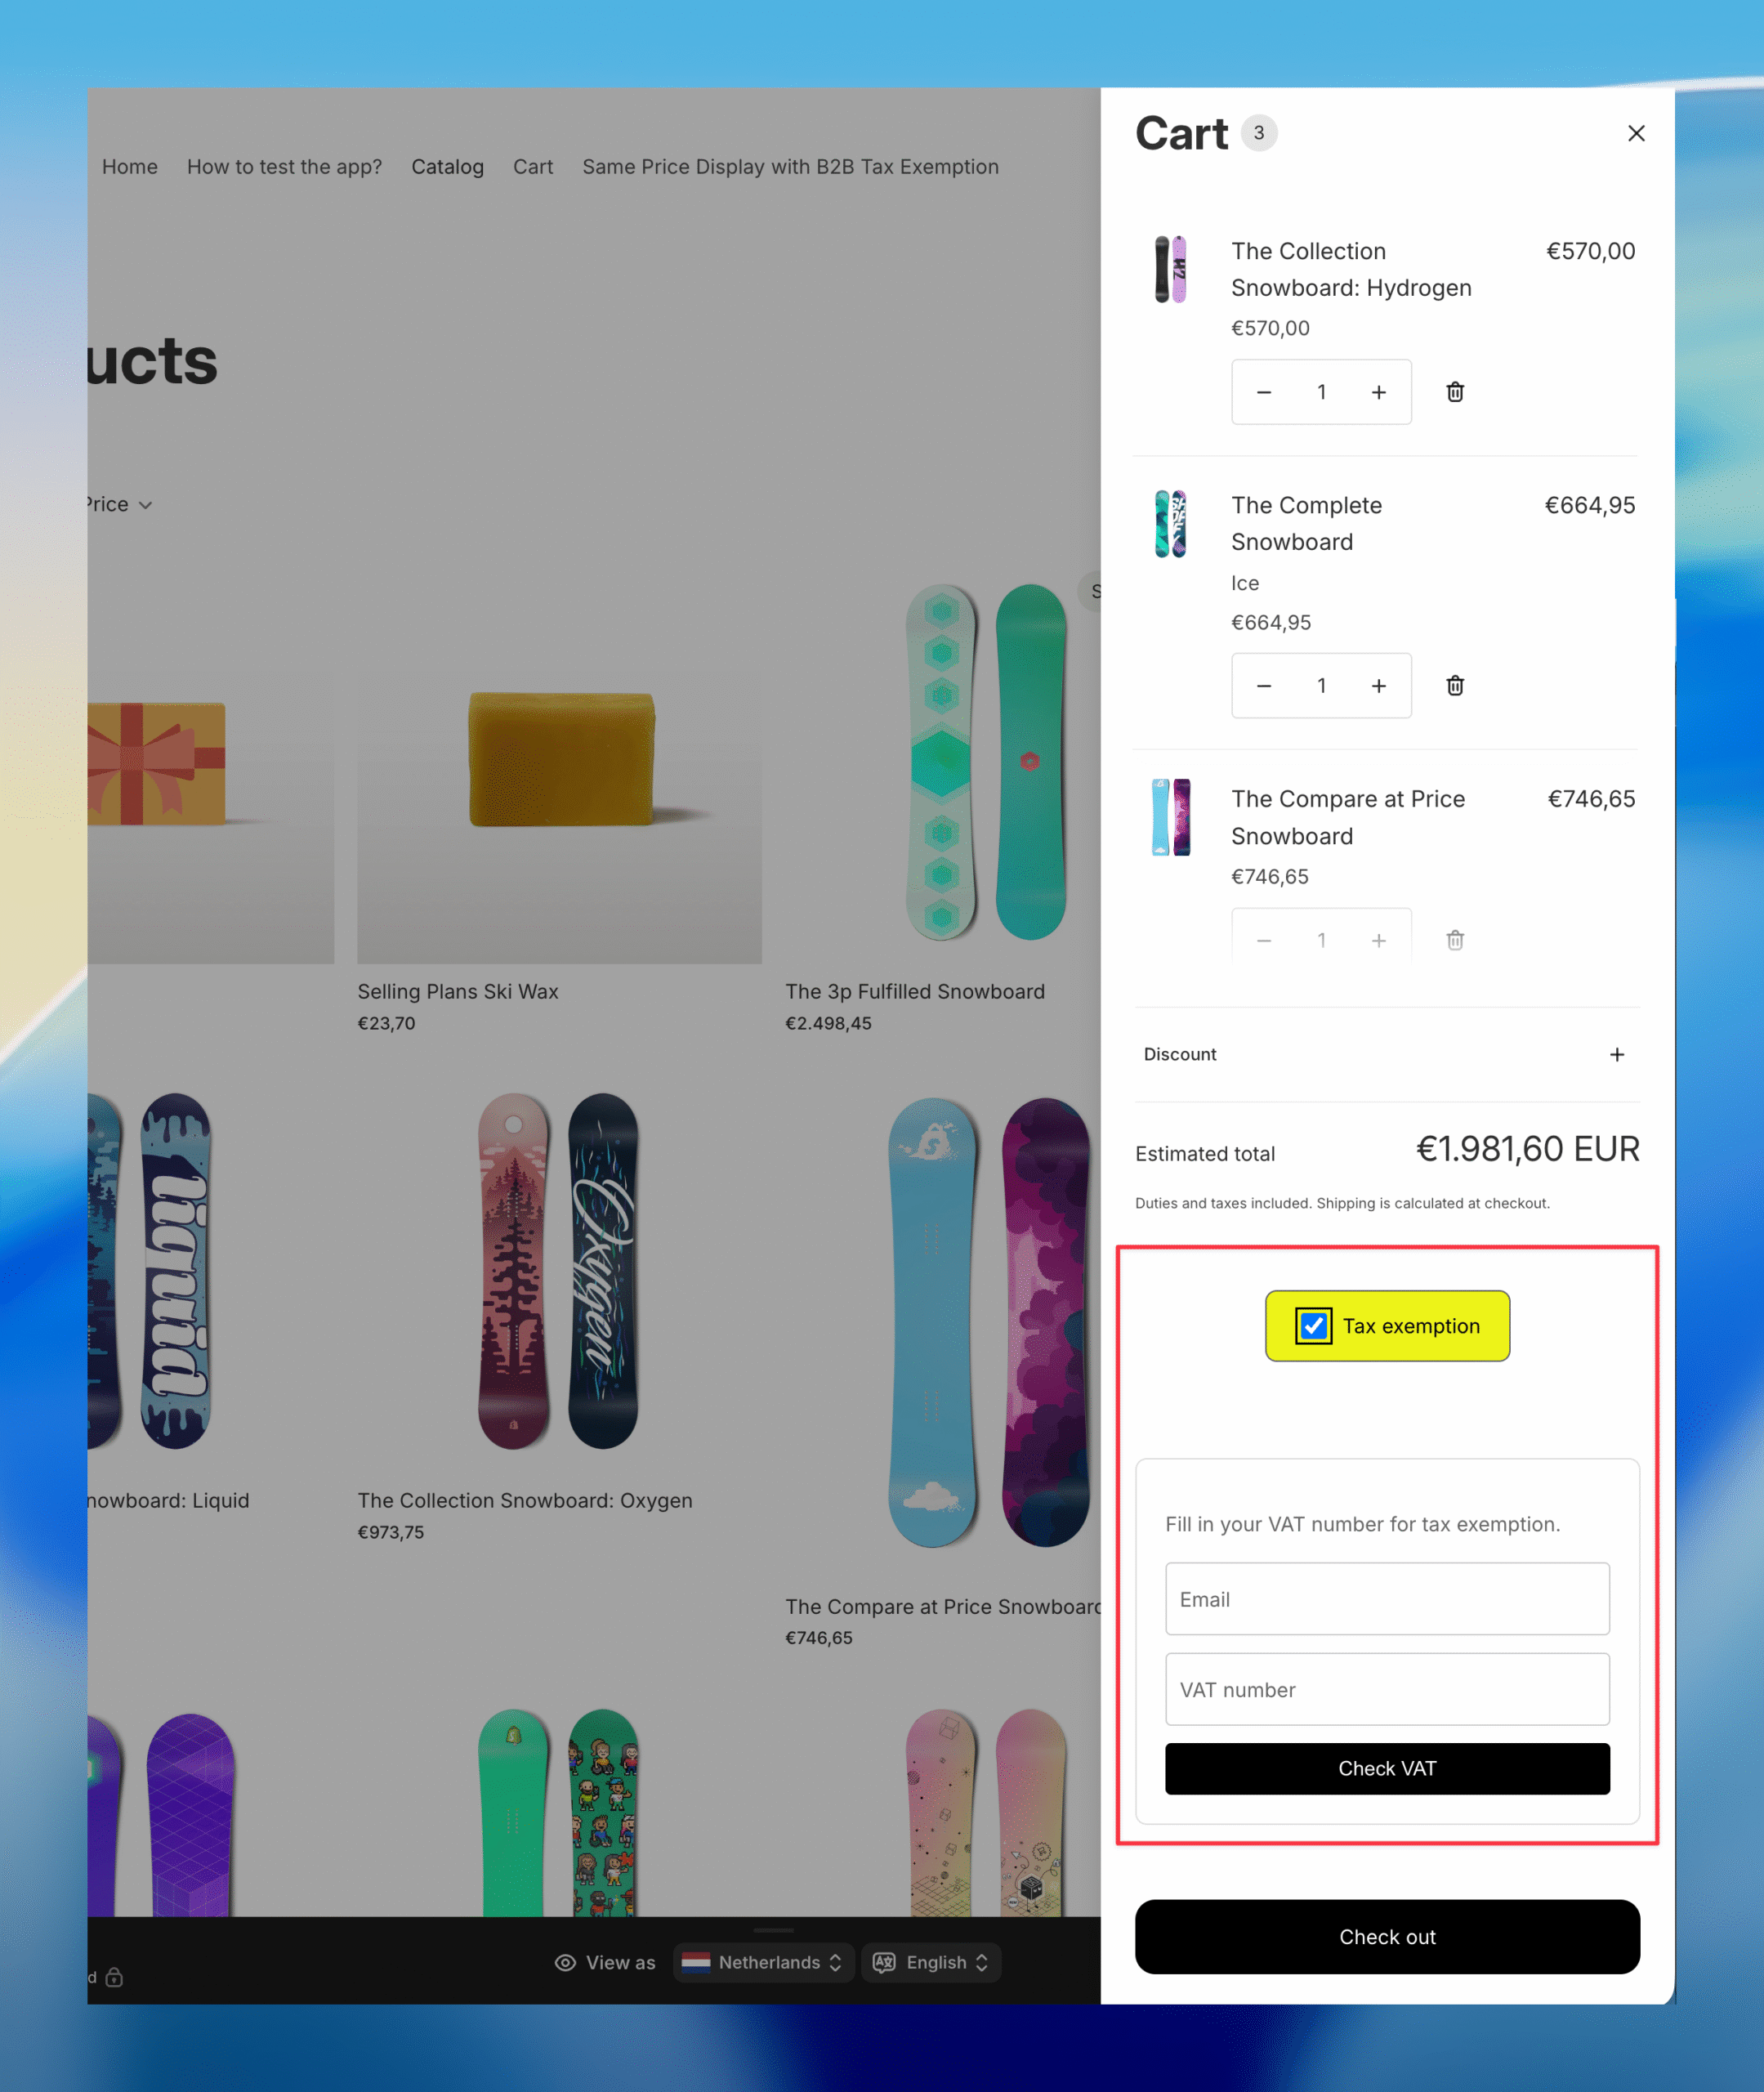
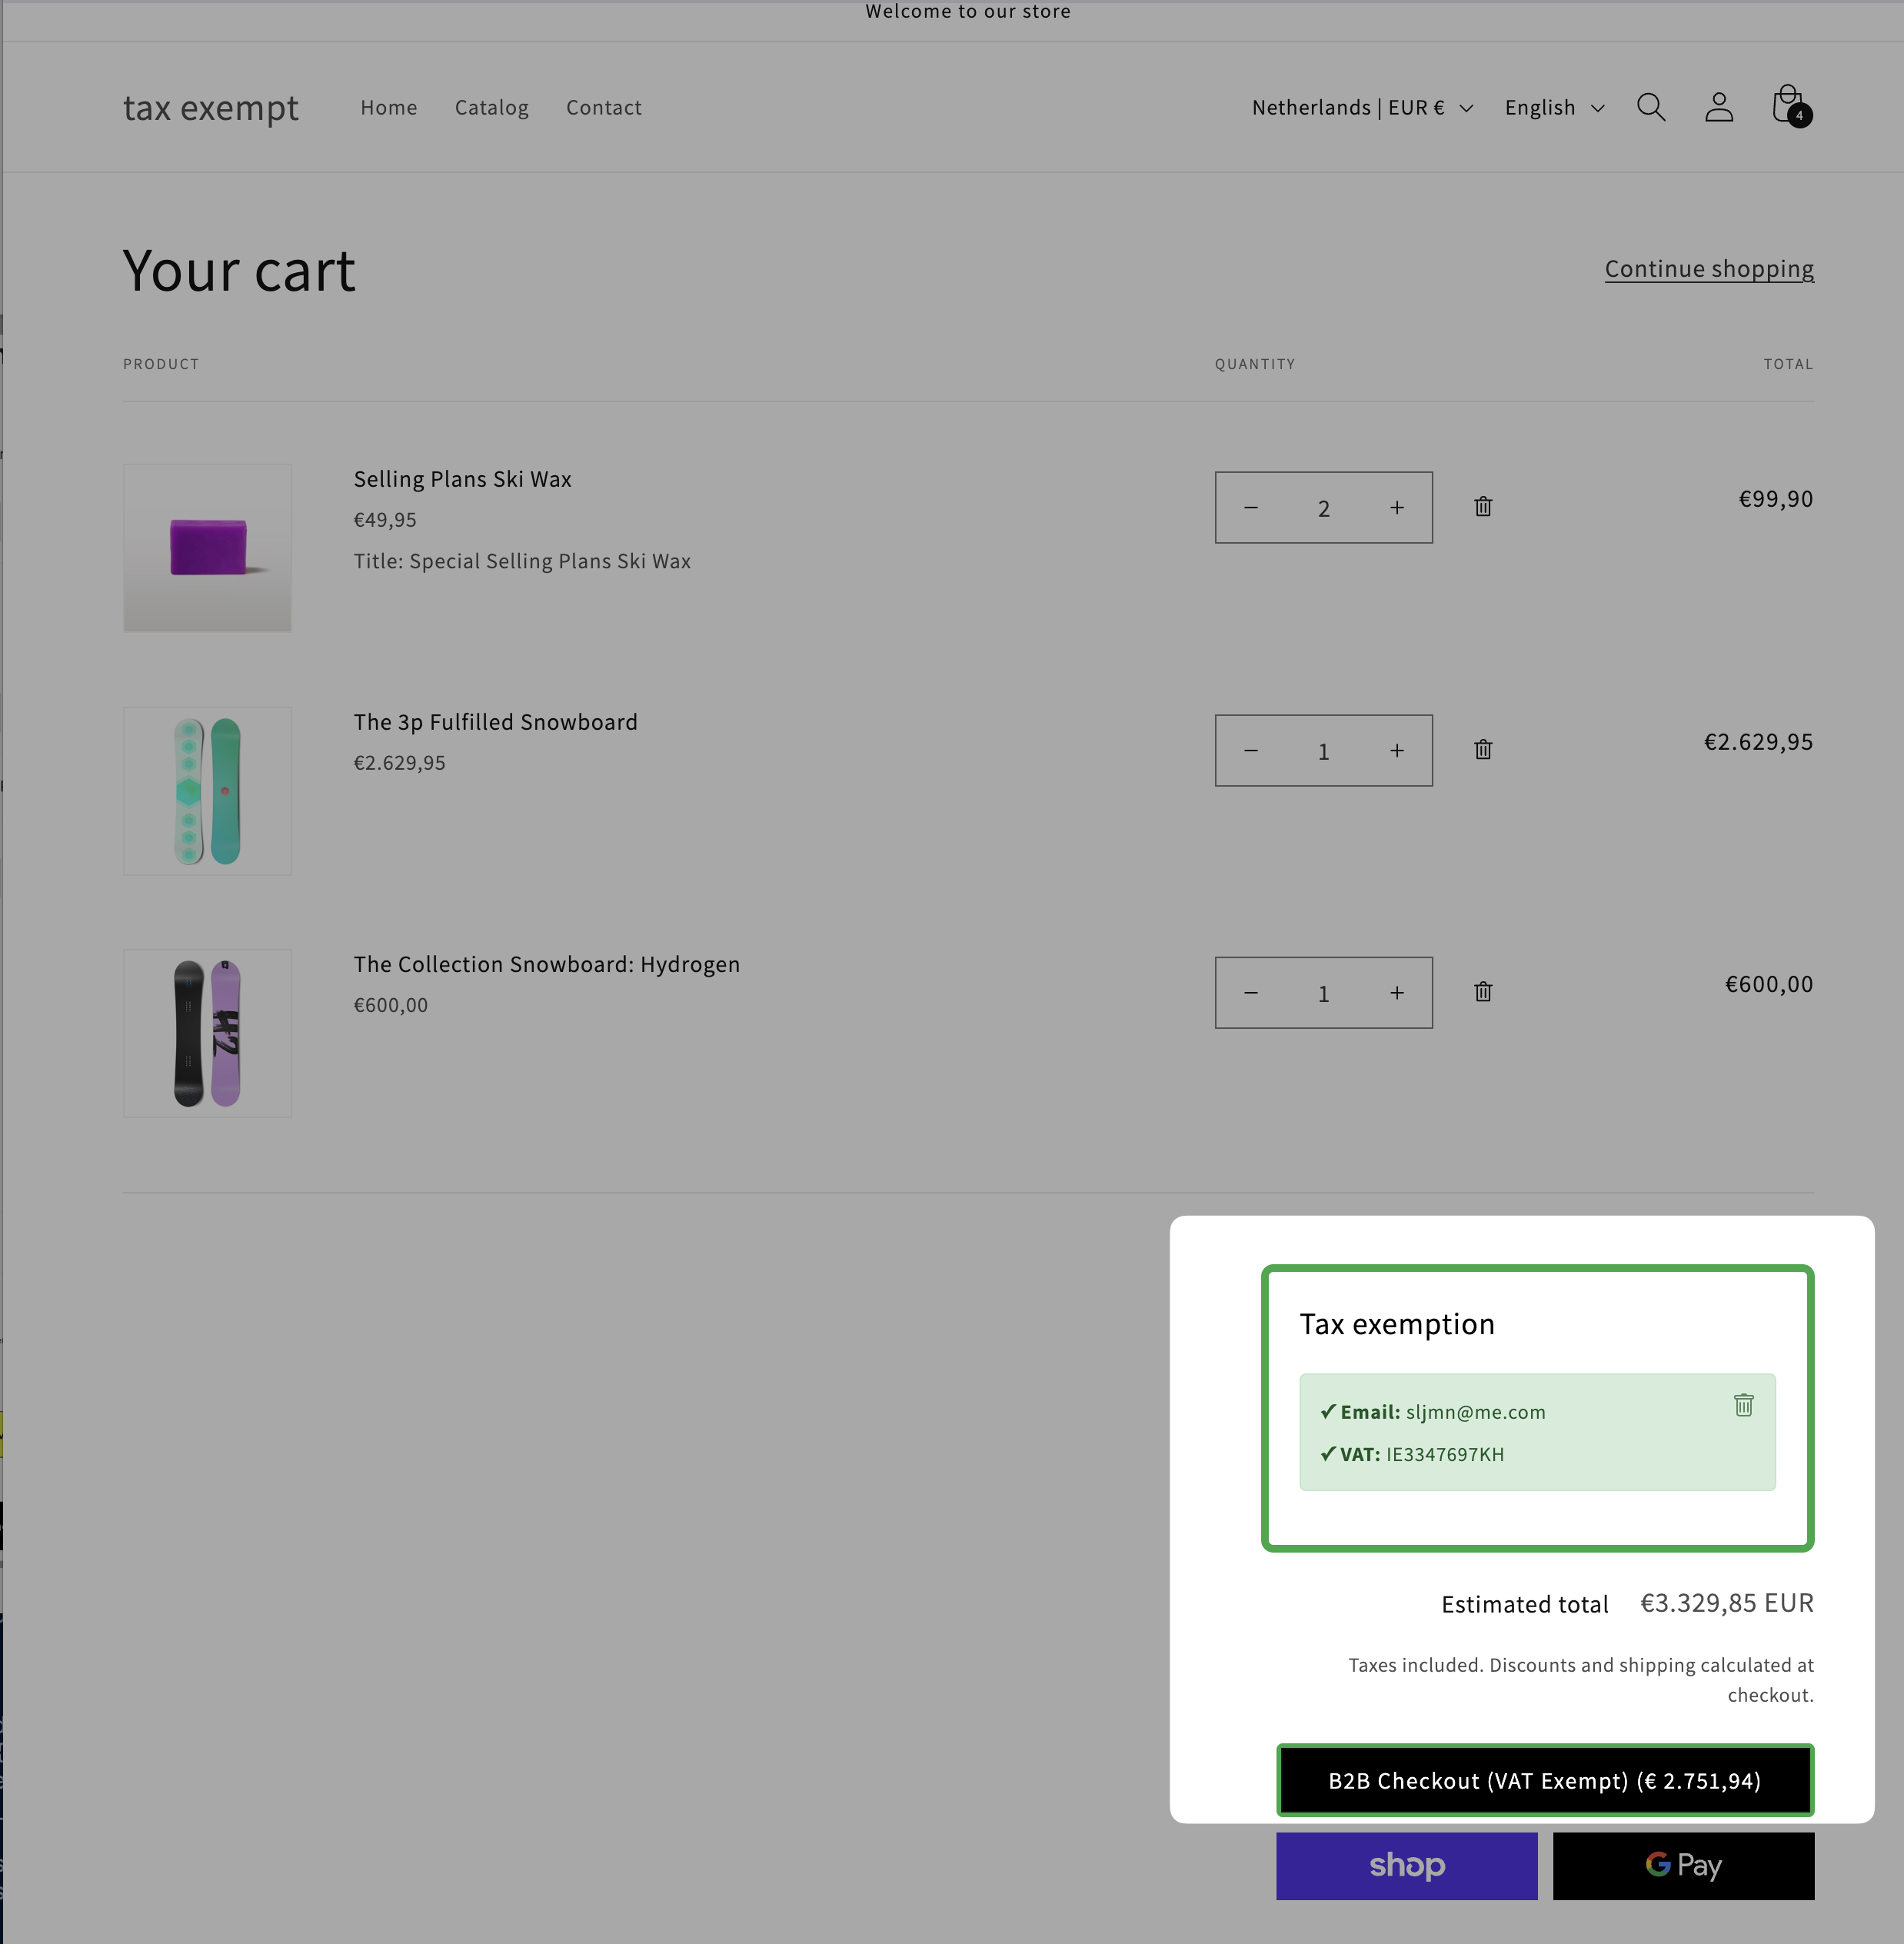
Good places to add VAT validation:
Example of the cart drawer:
Example of the /cart page:
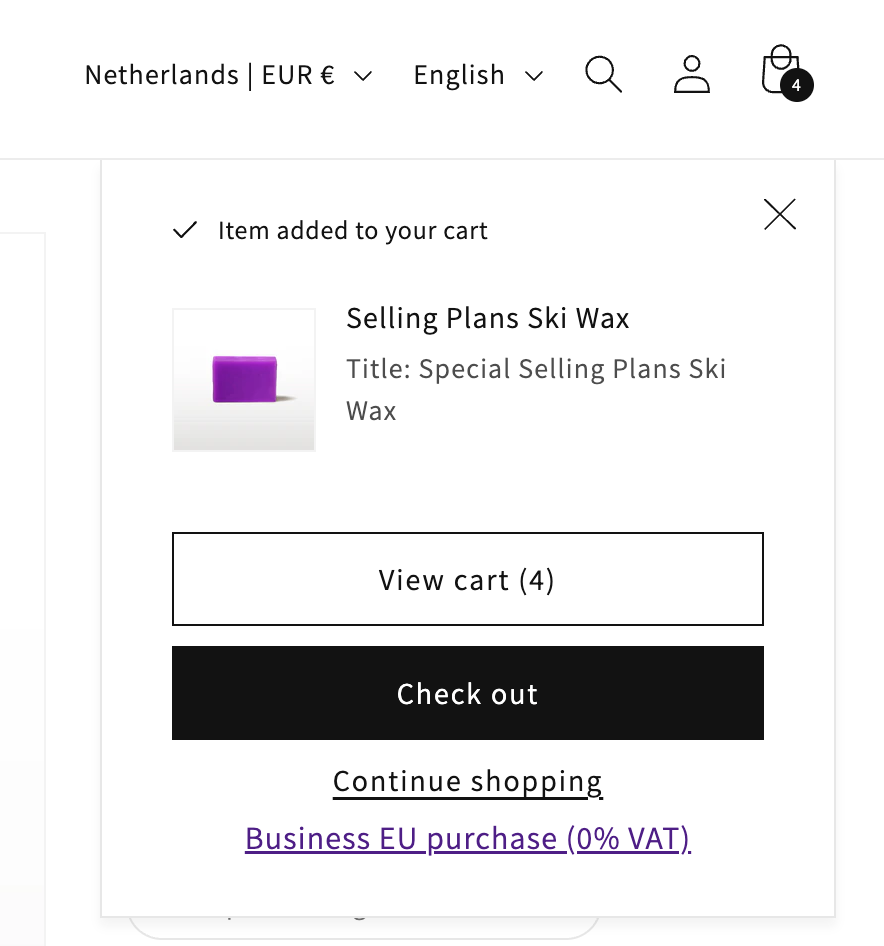
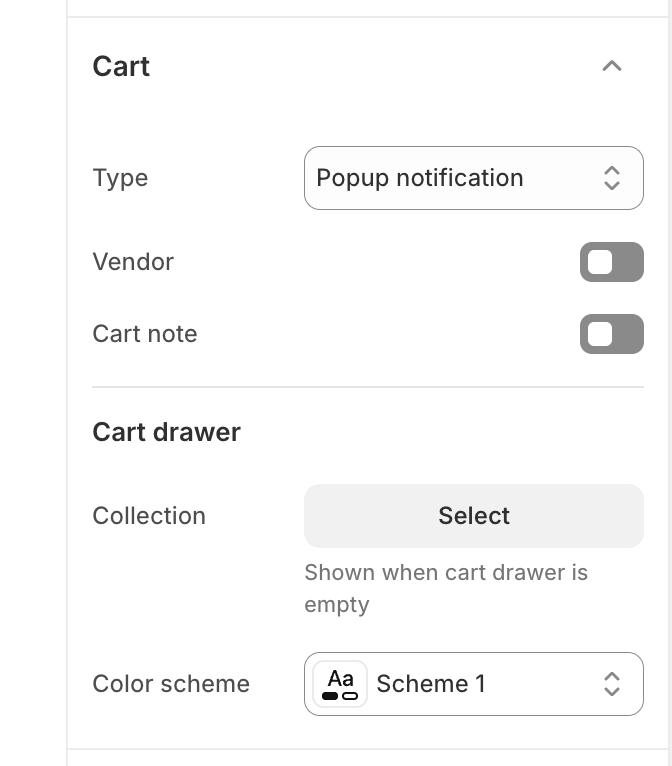
Does your theme work with a mini cart? And do you have the popup notification enabled in the Shopify theme editor?
Then something useful happens: when a customer adds a product to the cart, Shopify briefly shows the mini cart. This is the perfect moment to inform your business customer about VAT exemption.
The customer now has three options:
This is an effective way to let customers know that you offer VAT exemption.
You need to modify the file cart-notification.liquid.
Example code:
{% comment %}
  Renders cart notification

  Accepts:
  - color_scheme: {String} sets the color scheme of the notification (optional)
  - desktop_menu_type: {String} passes the desktop menu type which allows us to use the right css class (optional)

  Usage:
  {% render 'cart-notification' %}
{% endcomment %}

<cart-notification>
  <div class="cart-notification-wrapper{% if desktop_menu_type != 'drawer' %} page-width{% endif %}">
    <div
      id="cart-notification"
      class="cart-notification focus-inset{% if color_scheme %} color-{{ color_scheme }} gradient{% endif %}"
      aria-modal="true"
      aria-label="{{ 'general.cart.item_added' | t }}"
      role="dialog"
      tabindex="-1"
    >
      <div class="cart-notification__header">
        <h2 class="cart-notification__heading caption-large text-body">
          {{- 'icon-checkmark.svg' | inline_asset_content -}}
          {{ 'general.cart.item_added' | t }}
        </h2>

        <button
          type="button"
          class="cart-notification__close modal__close-button link link--text focus-inset"
          aria-label="{{ 'accessibility.close' | t }}"
        >
          <span class="svg-wrapper">
            {{- 'icon-close.svg' | inline_asset_content -}}
          </span>
        </button>
      </div>
      <div id="cart-notification-product" class="cart-notification-product"></div>
      <div class="cart-notification__links">
        <a
          href="{{ routes.cart_url }}"
          id="cart-notification-button"
          class="button button--secondary button--full-width"
        >
          {{- 'general.cart.view_empty_cart' | t -}}
        </a>
        <form action="{{ routes.cart_url }}" method="post" id="cart-notification-form">
          <button class="button button--primary button--full-width" name="checkout">
            {{ 'sections.cart.checkout' | t }}
          </button>
        </form>
        <button type="button" class="link button-label">{{ 'general.continue_shopping' | t }}</button>
        <br>
        {% comment %}
          Here you add the link to the /cart page
        {% endcomment %}
        <a href="{{ routes.cart_url }}">Business EU purchase (0% VAT)</a>
      </div>
    </div>
  </div>
</cart-notification>
{% style %}
  .cart-notification {
    display: none;
  }
{% endstyle %}
Important: The main addition is the link at the bottom:
<a href="{{ routes.cart_url }}">Business EU purchase (0% VAT)</a>This link directs customers to your cart page where they can enter their VAT number.